

Slow Cooker Recipes: Easy Meals, Less Effort!
Family-friendly dishes for busy people — quick prep, delicious results.
Grab yours for $4There’s something timeless about the combination of peanut butter and banana.
This recipe for Peanut Butter Banana Muffins brings together the rich, nutty flavor of peanut butter with the sweet, creamy taste of bananas.
Perfect for breakfast, a snack, or even a dessert, these muffins are as versatile as they are delicious.
They’re incredibly satisfying and filling, making them an excellent choice for anyone needing a quick energy boost.
The aroma of freshly baked muffins is an added bonus, wafting through your home and inviting everyone to the kitchen.
Once you try these, they’ll quickly become a staple in your baking repertoire.
The History and Cultural Significance
• Peanut Butter Banana traces its origins to the early 20th century in America, where it was popularized by the widespread availability of peanut butter.
• The dish evolved over decades as more diverse baking techniques were developed, eventually becoming the beloved version we know today.
• In American culture, this dish traditionally appears at breakfast tables and casual gatherings, symbolizing comfort and simplicity.
• While many variations exist across different regions, the authentic version maintains the essential pairing of peanut butter and banana that sets it apart from imitations.


Recipe Overview
Nutritional Information (per serving)
Essential Equipment Guide
Muffin Tin: Essential for shaping the muffins and ensuring even cooking. Non-stick tins with a good weight can improve baking results. Silicone molds are a good alternative for easy release.
Electric Mixer: Important for achieving a smooth and consistent batter, incorporating air for a lighter texture. A hand whisk can work as an alternative but requires more effort.
Cooling Rack: Allows muffins to cool evenly, preventing sogginess. Look for a sturdy rack with a grid pattern for optimal air circulation.


Ingredients
For the Base
|
| Amount | Ingredient | Notes |
|---|---|---|
| 1 cup | peanut butter | creamy for a smooth texture |
| 2 large | bananas | ripe, mashed |
| 2 cups | all-purpose flour | sifted for light texture |
| 1 teaspoon | baking soda | helps muffins rise |
| 1/2 teaspoon | salt | enhances flavor |
For Sweetness
| Amount | Ingredient | Notes |
|---|---|---|
| 1/2 cup | brown sugar | adds moisture and depth |
| 1/4 cup | honey | natural sweetener |
For Moisture
| Amount | Ingredient | Notes |
|---|---|---|
| 1 cup | milk | dairy or non-dairy, adds richness |
| 2 large | eggs | lightly beaten, binds ingredients |


Preparation Methods
Mixing Wet Ingredients: Thoroughly combine wet ingredients to ensure consistent distribution throughout the batter. This step is crucial for flavor consistency in every bite. Use a whisk to incorporate air for fluffiness.
Folding Technique: Gently fold the dry ingredients into the wet mixture to maintain the airiness of the batter. This technique prevents overmixing, which can lead to dense muffins. Use a spatula for controlled folding.
Even Scooping: Use an ice cream scoop to evenly distribute batter into muffin tins. This ensures uniform size and even baking. Consistency in scooping leads to professional-looking muffins.


Step 1: Preheat the Oven
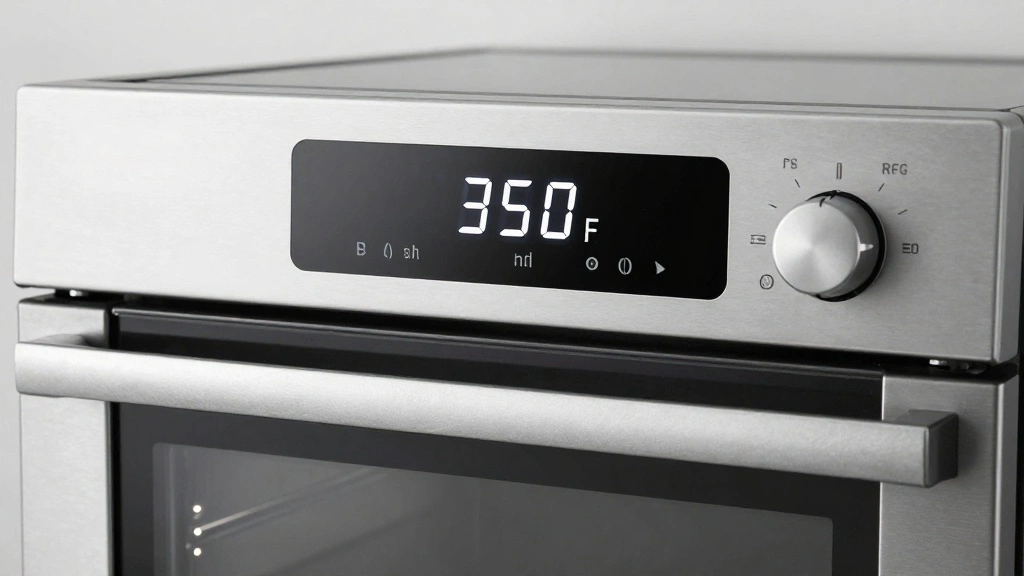
Set your oven to 350°F (175°C) and allow it to preheat.
This ensures even baking from the start.
A properly preheated oven is key for achieving a good rise.
Use an oven thermometer for accuracy.


Step 2: Prepare the Muffin Tin
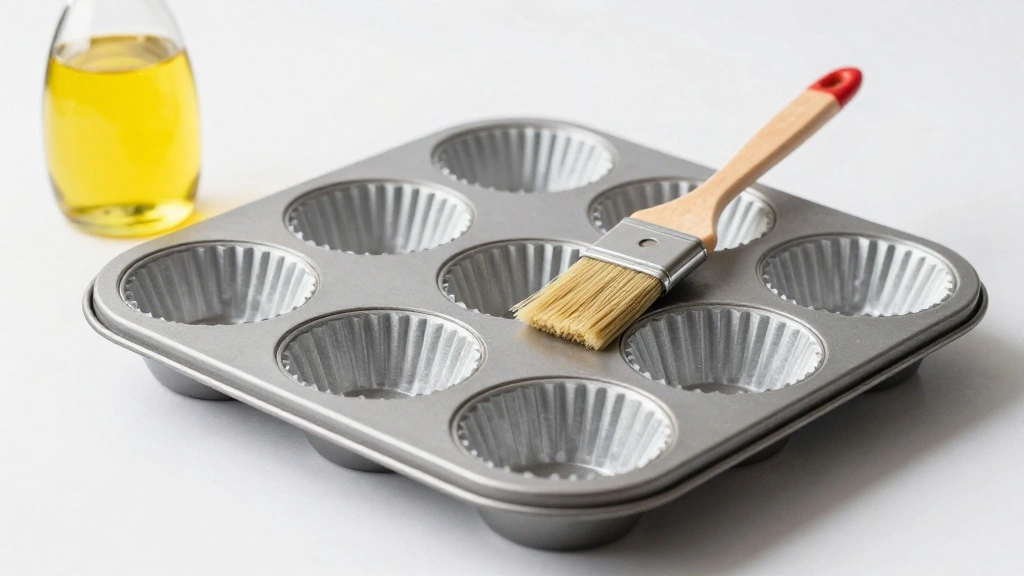
Lightly grease a 12-cup muffin tin or line with paper liners.
This prevents the muffins from sticking after baking.
Ensure all cups are evenly coated to avoid uneven baking.
Use a pastry brush for precise application.
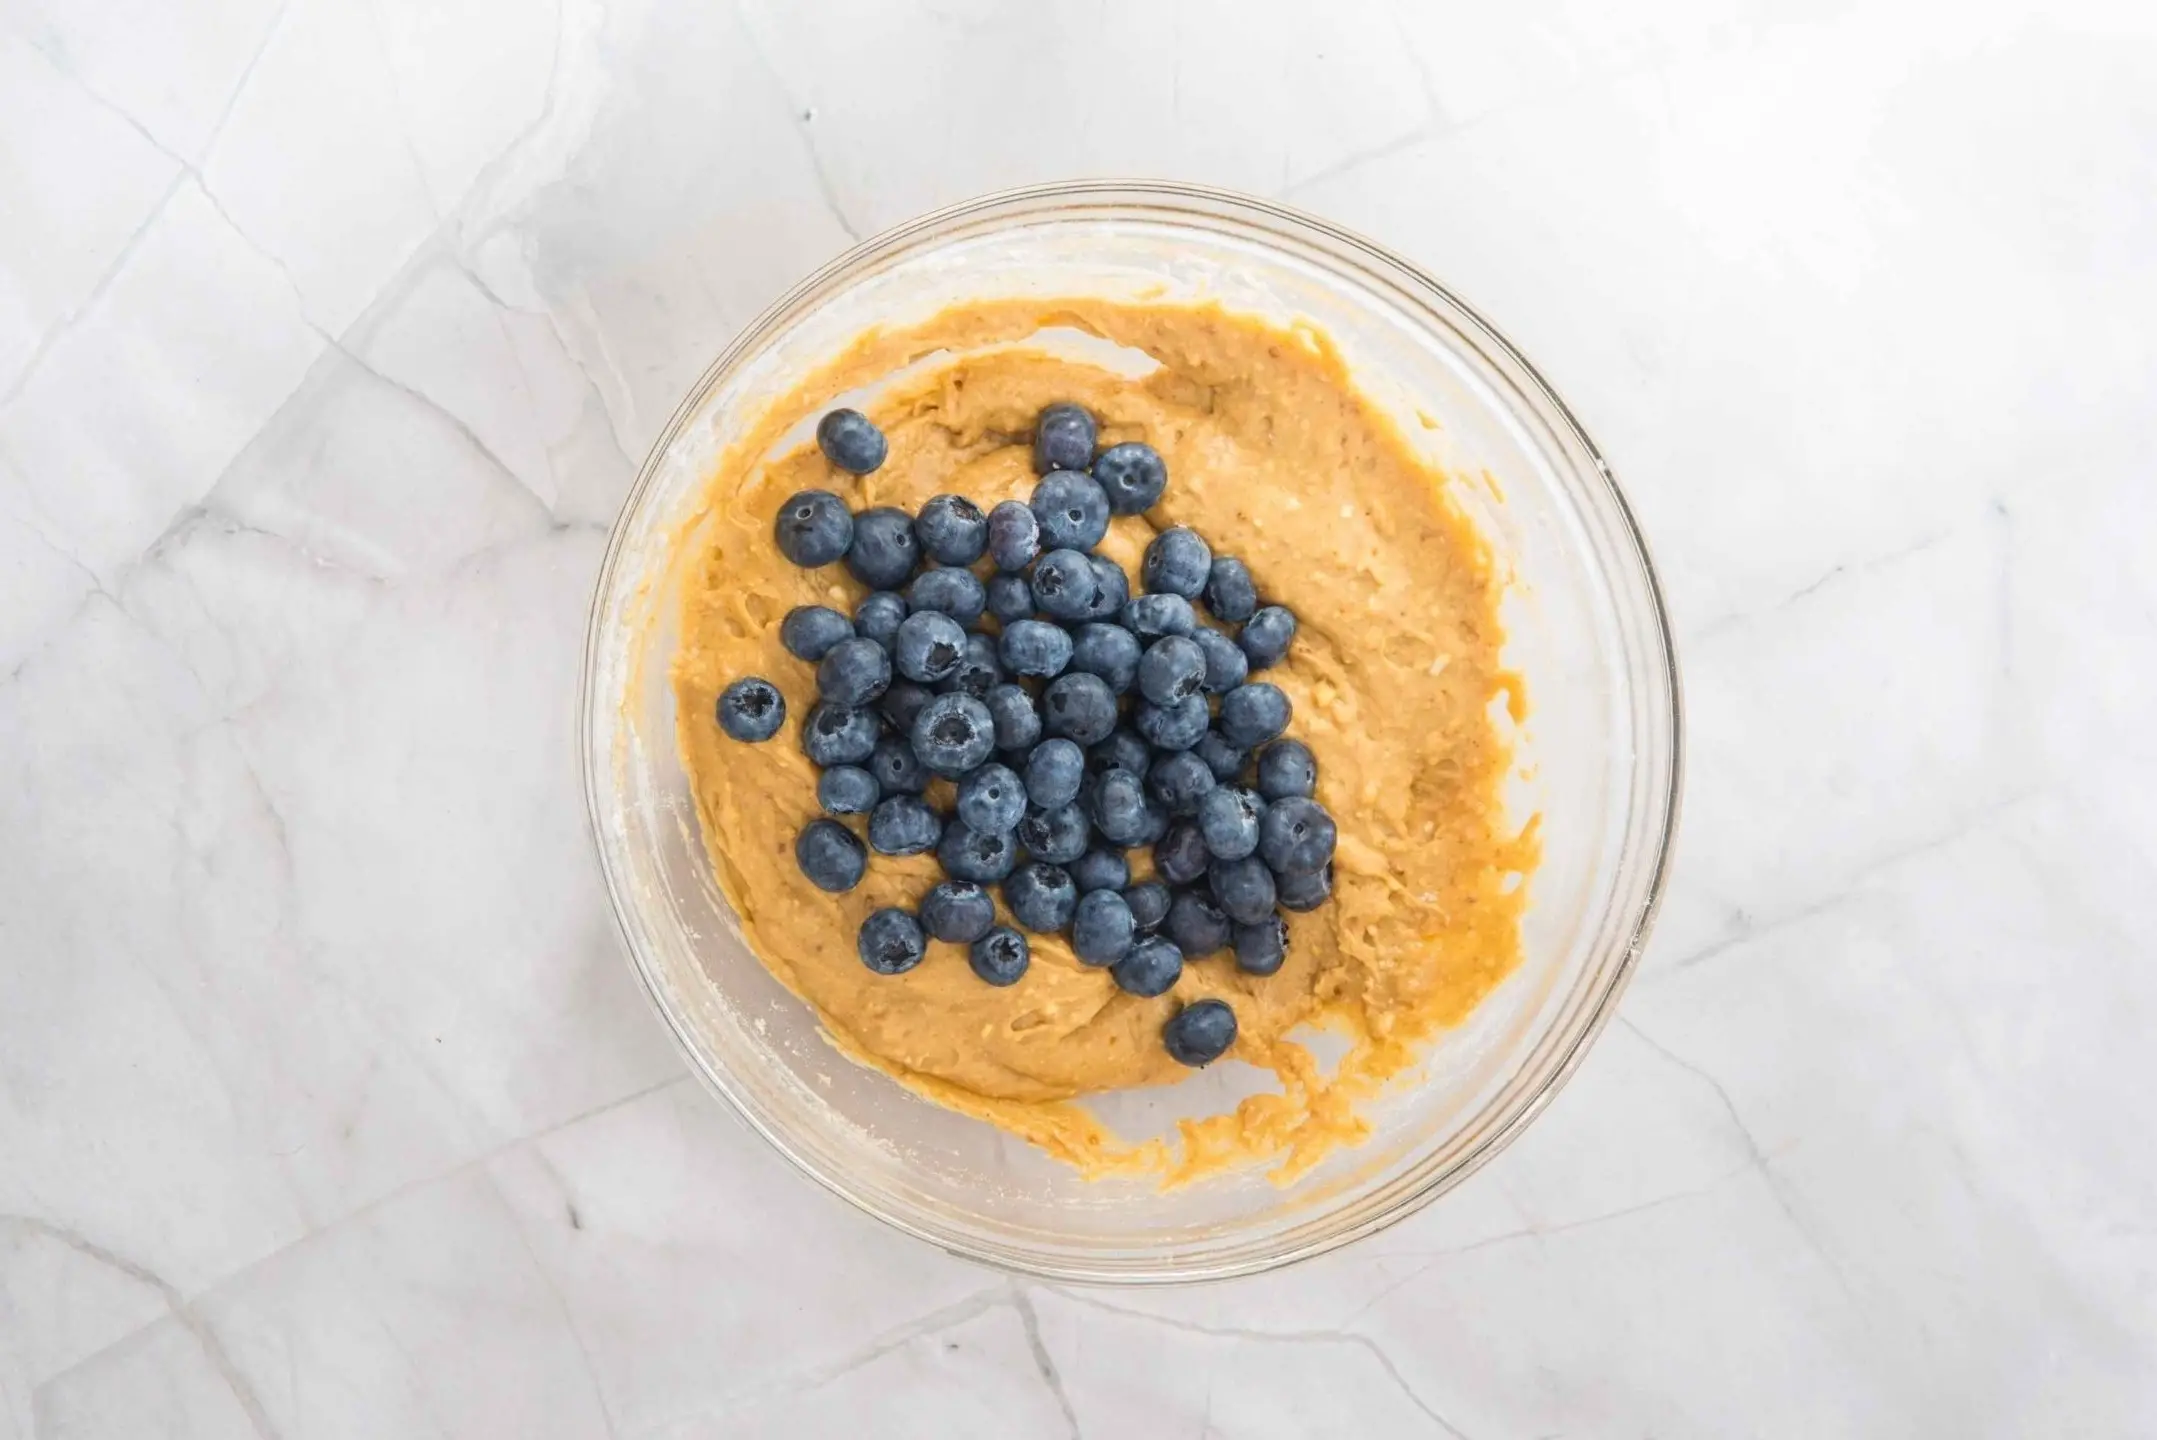
Step 3: Mash the Bananas
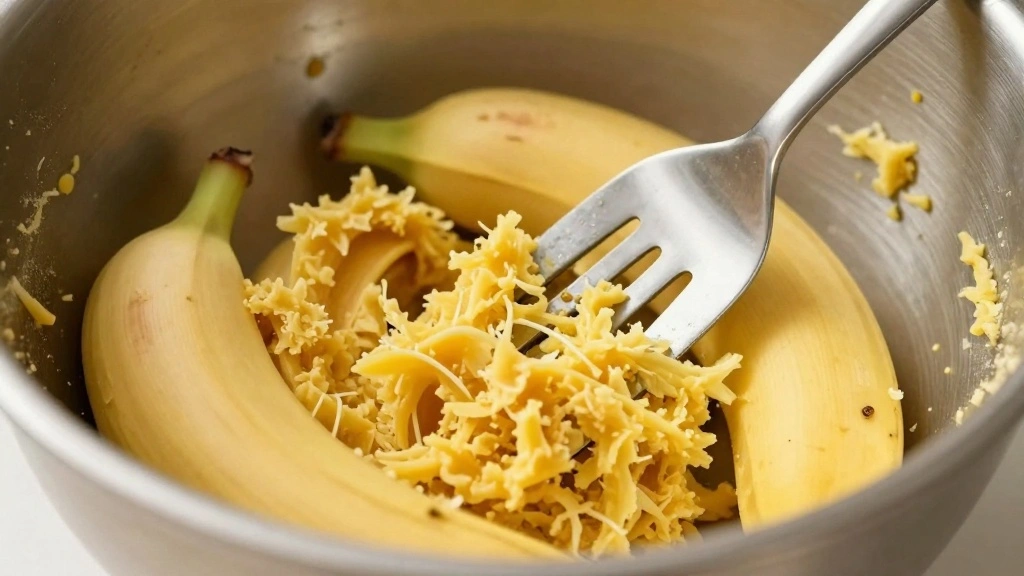
Peel and mash the bananas in a large mixing bowl.
Mash until smooth, with a few small lumps remaining.
This creates the base for the wet ingredients.
Use a fork or potato masher for best results.
Step 4: Mix Wet Ingredients

Add peanut butter, brown sugar, honey, milk, and eggs to the mashed bananas.
Whisk together until the mixture is smooth and well combined.
Look for a uniform consistency without lumps.
Ensure each ingredient is fully incorporated.


Step 5: Combine Dry Ingredients
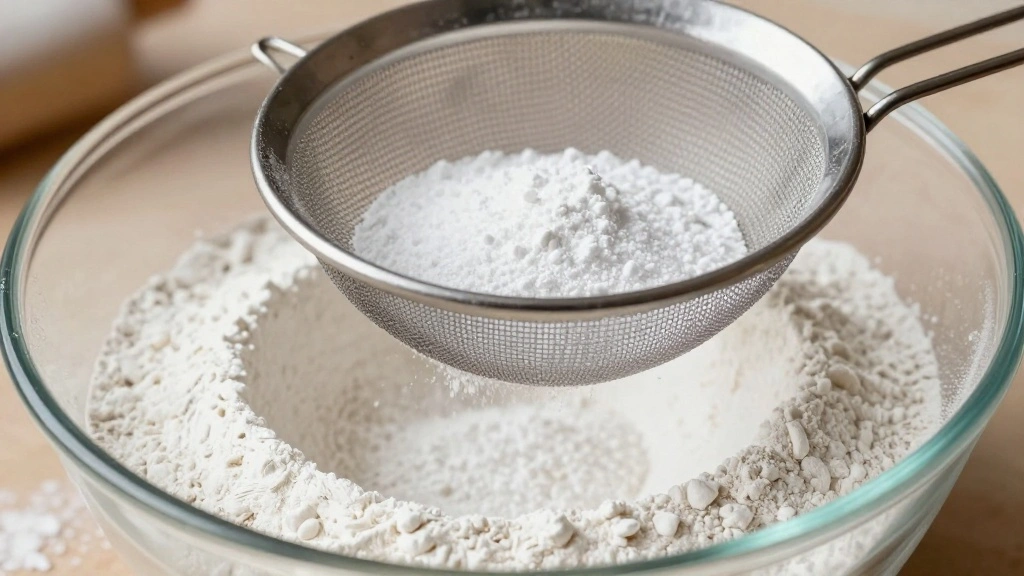
In a separate bowl, sift together the flour, baking soda, and salt.
Sifting aerates the flour and removes any lumps.
Ensure all dry ingredients are evenly distributed.
Use a fine mesh sieve for effective sifting.


Step 6: Fold Ingredients Together
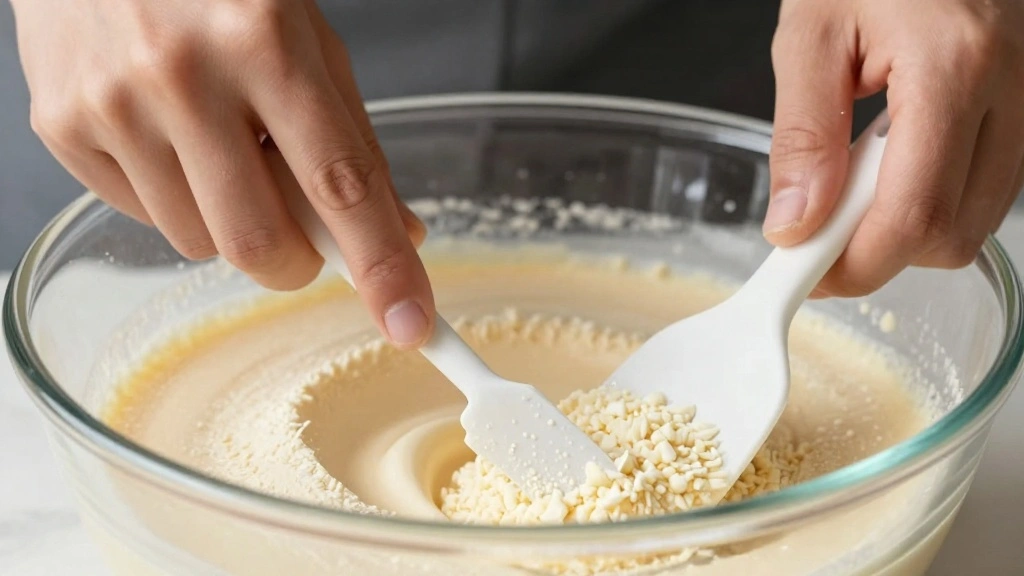
Gently fold the dry ingredients into the wet mixture.
Use a spatula to incorporate without overmixing.
Mix until just combined, with no streaks of flour.
This step is crucial for maintaining a light texture.
Step 7: Fill the Muffin Tin
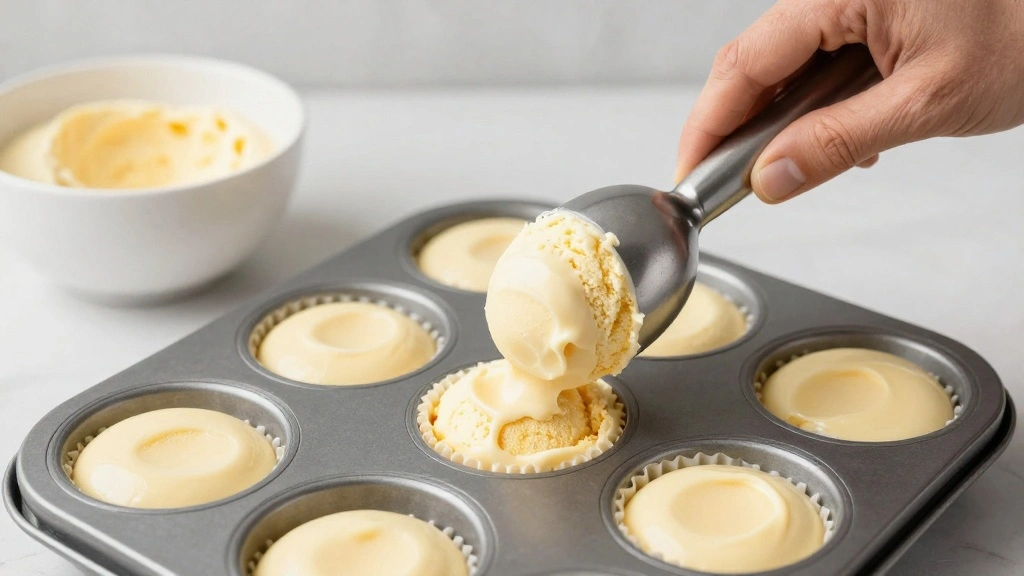
Use an ice cream scoop to evenly distribute the batter into the prepared muffin tin.
Fill each cup about 3/4 full to allow for rising.
Ensure each cup has an equal amount of batter.
This helps the muffins bake uniformly.


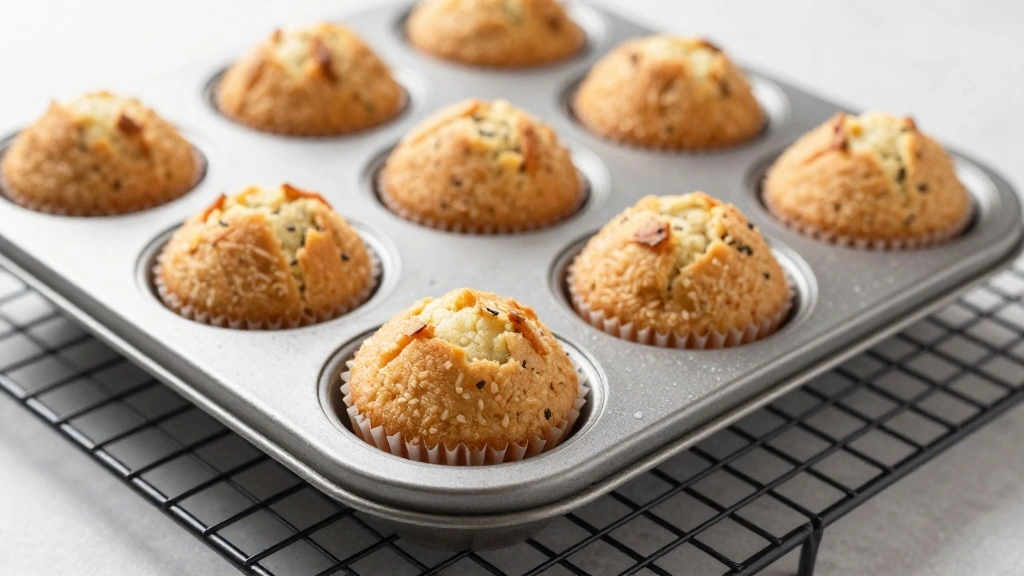
Step 8: Bake the Muffins

Place the muffin tin in the preheated oven on the center rack.
Bake for 20 minutes or until a toothpick inserted comes out clean.
Look for a golden brown color on top.
Avoid opening the oven door during baking to maintain temperature.


Step 9: Cool the Muffins
Remove the muffins from the oven and place the tin on a cooling rack.
Let them cool in the tin for 5 minutes.
Transfer muffins to the rack to cool completely.
This prevents them from becoming soggy.
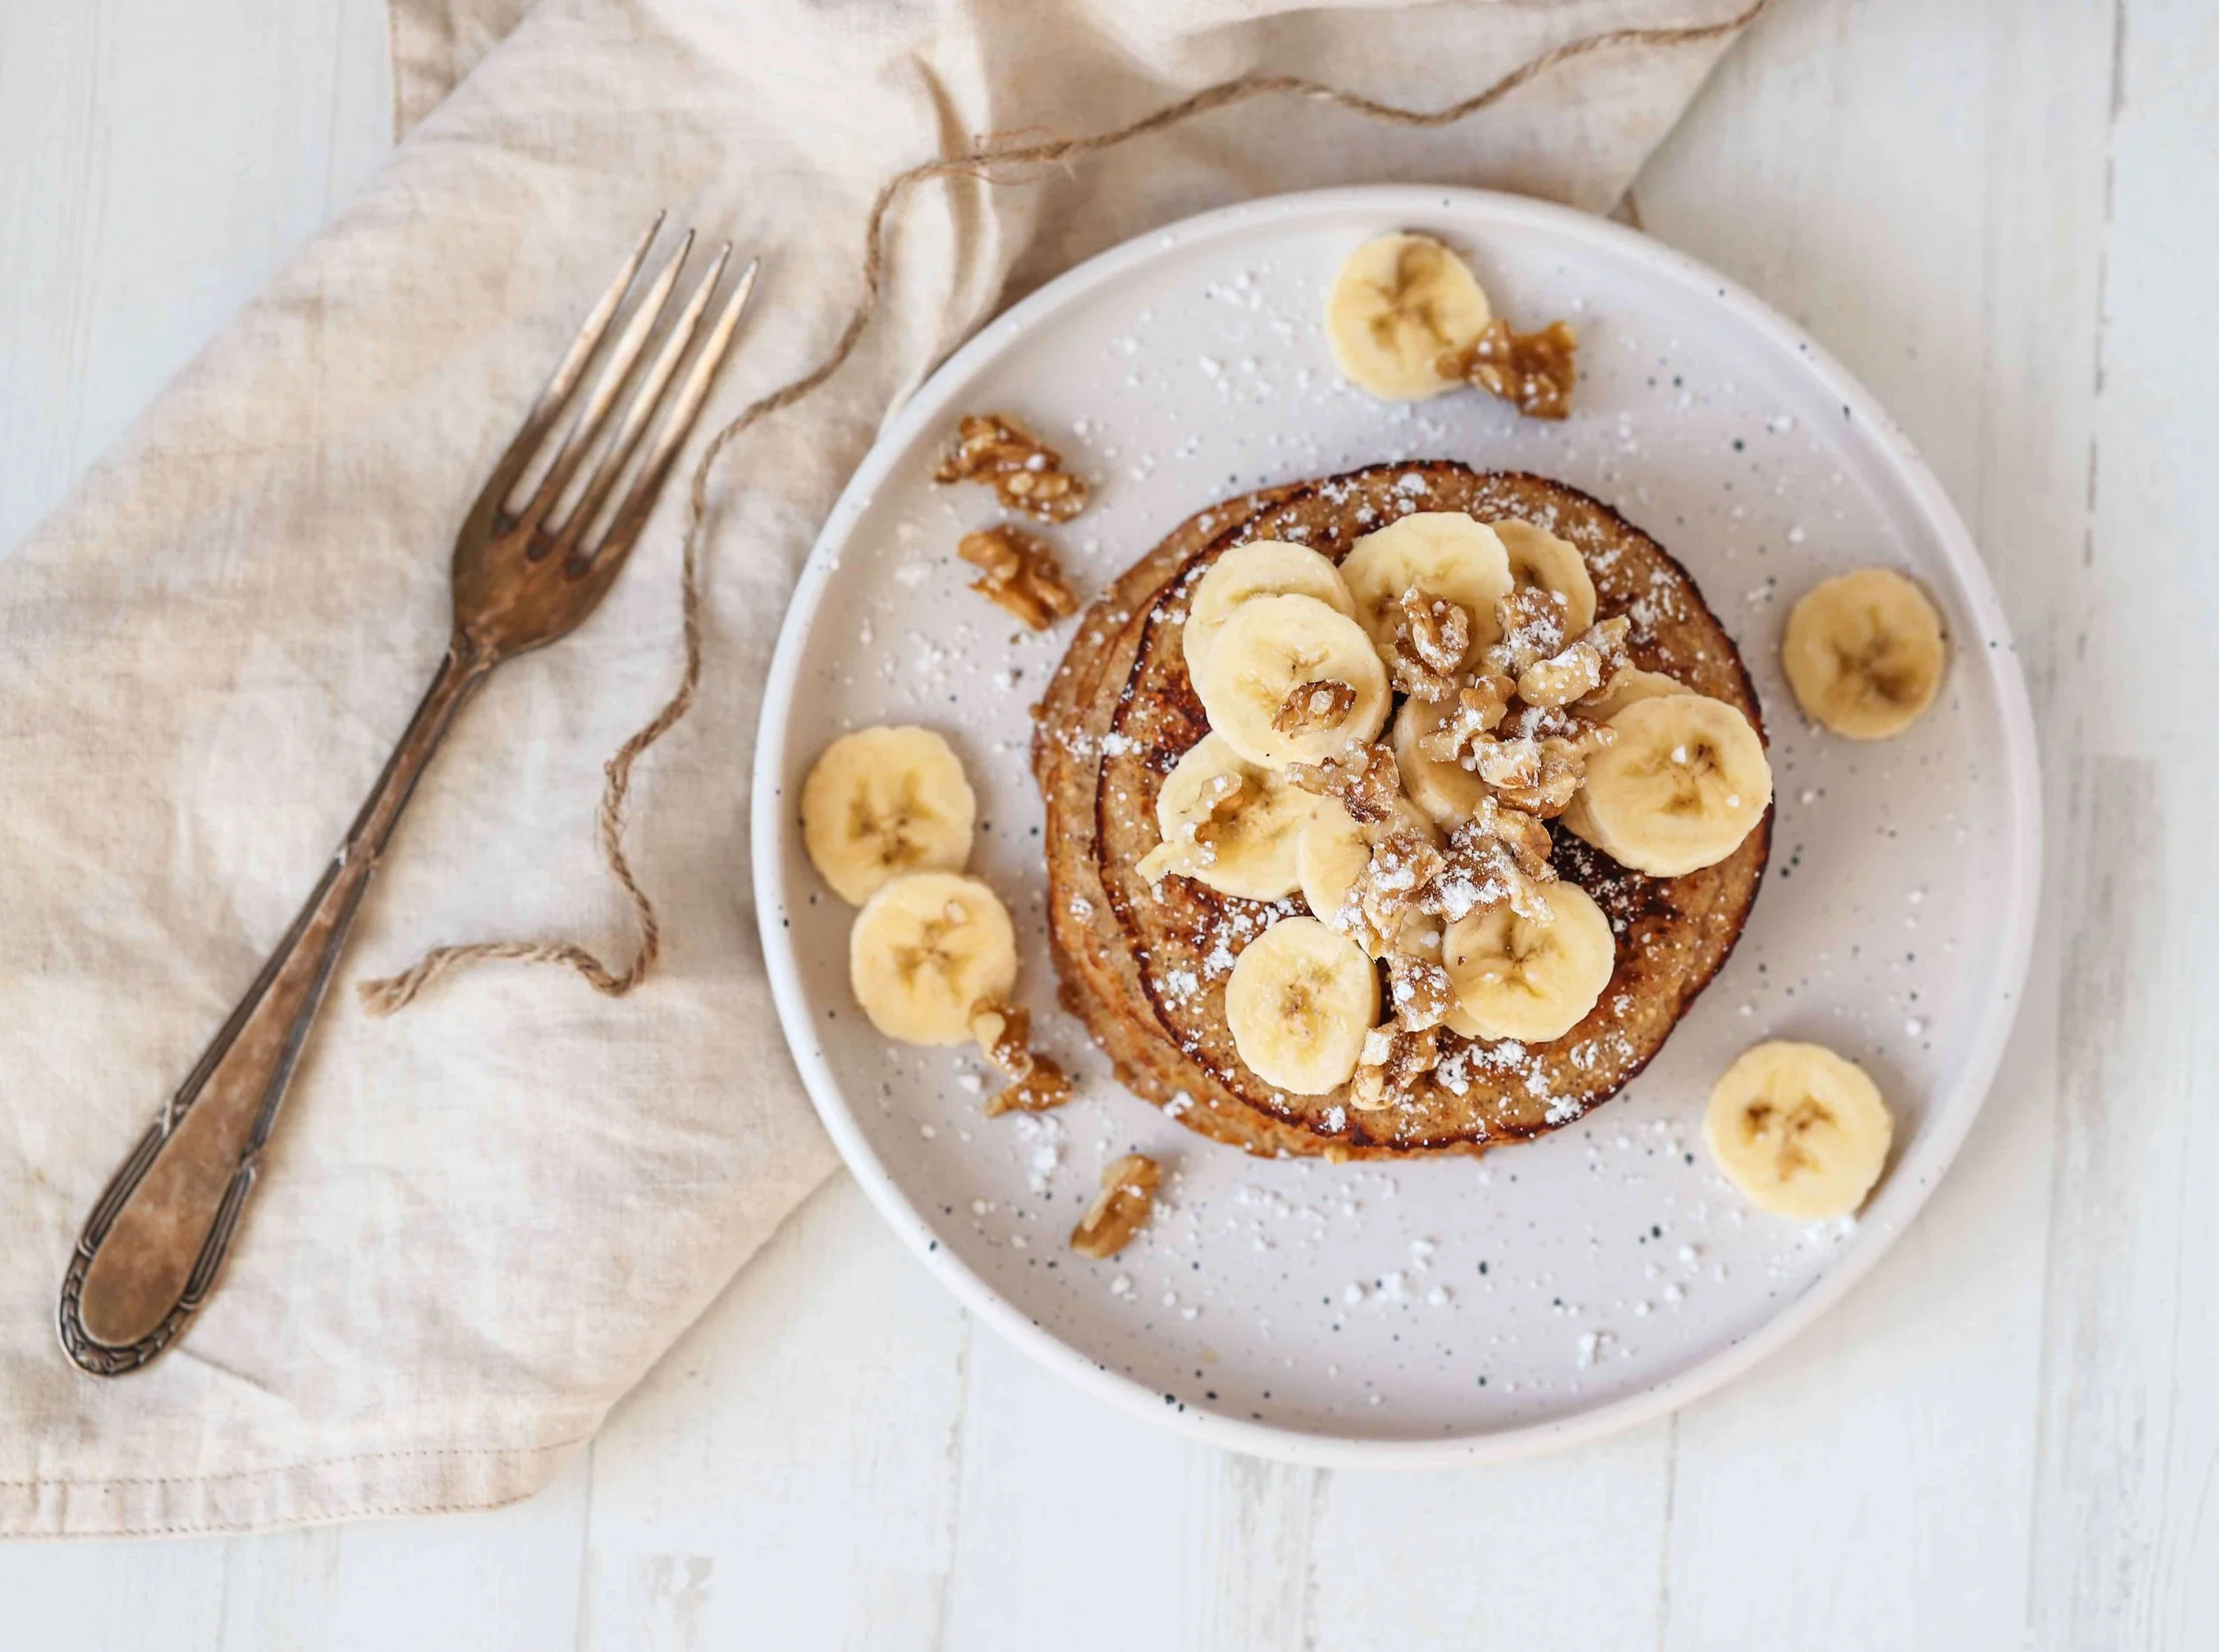
Step 10: Serve and Enjoy
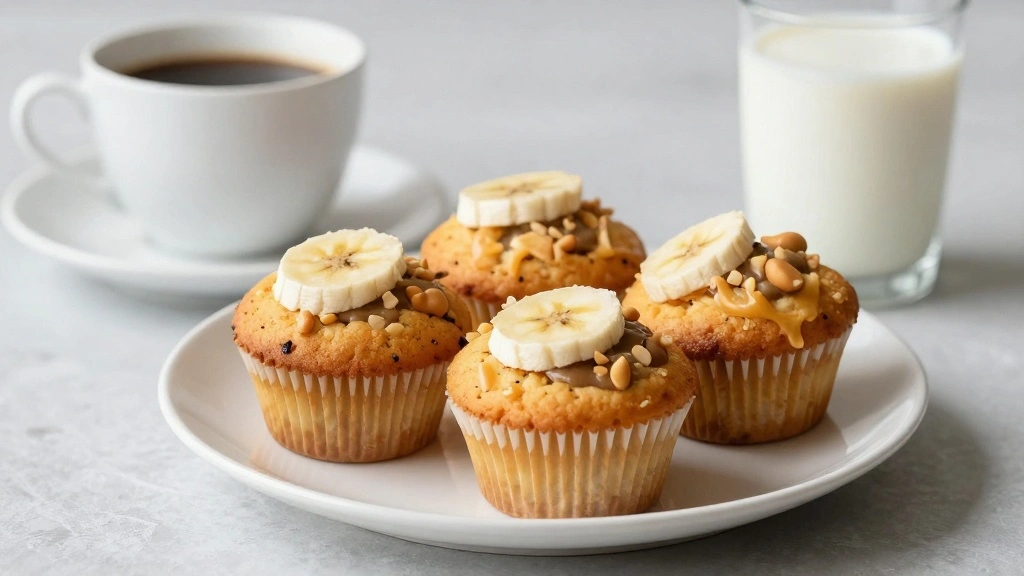
Once cooled, serve the muffins warm or at room temperature.
Pair with a glass of milk or a cup of coffee.
The muffins should be moist and flavorful.
Store leftovers in an airtight container.


Critical Timing and Temperature Guide
Baking: Bake at 350°F (175°C) for exactly 20 minutes. Look for a golden brown top and a clean toothpick test. Avoid overbaking to prevent dryness.
Cooling: Allow muffins to cool in the tin for 5 minutes before transferring to a cooling rack. This initial cooling period helps set their structure, preventing collapse.
Preheating: Ensure the oven is fully preheated to 350°F before baking. Inconsistent temperatures can lead to uneven rising and dense texture.


Pro Tips for Peanut Butter Banana
• Ingredient Selection: Choose ripe bananas with brown spots for maximum sweetness and flavor.
• Preparation Secret: Let the batter rest for 5 minutes before scooping to allow the baking soda to activate.
• Temperature Management: Use room temperature eggs and milk for a more consistent batter texture.
• Texture Enhancement: Sift flour and baking soda to incorporate air and ensure a light, fluffy muffin.
• Flavor Layering: Add a pinch of cinnamon to the dry ingredients for a warm, spicy undertone.
• Make-Ahead Strategies: Prepare and refrigerate the batter for up to 24 hours before baking. This can enhance flavor depth.
• Restaurant-Quality Finishing Touches: Drizzle with melted chocolate or sprinkle with chopped nuts before serving.
• Equipment Optimization: Use non-stick muffin liners for easy release and minimal cleanup.
Troubleshooting Common Issues
• Texture Too Dense: This can be caused by overmixing the batter or using old baking soda. Ensure gentle folding and fresh leavening agents.
• Flavors Unbalanced: If too sweet or too bland, adjust the amount of sugar or salt to taste. Balance with a dash of vanilla extract.
• Muffins Sticking to Tin: Ensure proper greasing or use liners. Non-stick spray or silicone liners can help.
• Uneven Rising: Check for level oven racks and consistent oven temperature. Rotate the tin halfway through baking if necessary.
• Overcooked Tops: If tops brown too quickly, cover loosely with foil during the last 5 minutes of baking.
Variations and Regional Differences
• Southern Style Variation: Incorporates pecans and a dash of nutmeg for a classic Southern flavor. Often enjoyed warm with a pat of butter.
• Vegan Variation: Substitutes eggs with flaxseed meal and milk with almond milk, maintaining moisture and flavor without animal products.
• Gluten-Free Variation: Uses almond or coconut flour instead of all-purpose flour, providing a nutty flavor and dense texture.
• Asian-Inspired Variation: Infuses the batter with green tea powder and tops with sesame seeds for a unique twist.
Food Science Behind the Recipe
• Leavening Chemistry: Baking soda reacts with the acids in bananas to create carbon dioxide, which helps the muffins rise.
• Maillard Reaction: The browning of the muffin tops is due to the Maillard reaction, enhancing flavor complexity and aroma.
• Emulsification: Eggs act as an emulsifier, binding the fats and liquids together for a stable and uniform batter.


Frequently Asked Questions
What's the most common mistake people make when preparing Peanut Butter Banana Muffins? Overmixing the batter, which can lead to dense and tough muffins.
Can I freeze these muffins? Yes, they freeze well. Store in an airtight container for up to 3 months.
How can I make these muffins healthier? Substitute half the flour with whole wheat flour and reduce the sugar by a quarter.
What if I’m allergic to peanuts? Use almond or sunflower seed butter as an alternative.
Can I add chocolate chips? Absolutely, fold in 1/2 cup of chocolate chips with the dry ingredients for added sweetness.
Why did my muffins sink in the middle? This could be due to underbaking or opening the oven door too early.
How do I achieve a crunchy top? Sprinkle a mix of sugar and chopped nuts on top before baking for a crunchy finish.
Serving and Presentation Guide
• Traditional Presentation: Serve muffins warm on a rustic wooden board, accompanied by a small bowl of fresh fruit.
• Breakfast Buffet Style: Arrange muffins on a tiered stand with assorted spreads like honey and butter.
• Café Presentation: Wrap muffins in parchment paper squares, tied with twine for a charming, artisanal touch.
• Gift Presentation: Pack muffins in a decorative box lined with tissue paper for a lovely homemade gift.
Conclusion

Peanut Butter Banana Muffins are a delightful treat that combines classic flavors with a modern twist.
With this recipe, you can enjoy a delicious and satisfying snack that’s perfect for any time of day.
We hope you feel inspired to try making these at home and share them with your loved ones.
Happy baking!